
Custom Interactive Segmentation Model: Train It on Your Images
 Grigoriy MananianUpdated
Train a custom click-based segmentation model (RITM) on your own images with no code. Benchmark on plant images: 18 minutes vs 66 for SAM and 190 by hand.
A custom interactive segmentation model is a click-based model, such as RITM, trained on your own images. In Supervisely you train it without code. On 50 plant objects, the custom model cut total labeling time from 190 minutes by hand to 18. SAM needed 66.
What is a custom interactive segmentation model?
Interactive segmentation is the engine behind the Smart Tool in the Supervisely image labeling toolbox. You click on an object, the model predicts a mask, and you add positive or negative clicks to fix errors. Supervisely ships RITM and Segment Anything (SAM) for this, and you can plug in your own trained model.
Public models are trained on common datasets. The RITM authors found that a mix of COCO and LVIS gave the best results, and SAM was trained on 11 million images with over 1 billion masks. Those are great for everyday objects. Plants in poor light, cracks in concrete or cells under a microscope look different. A model trained on your images learns your shapes and your textures.
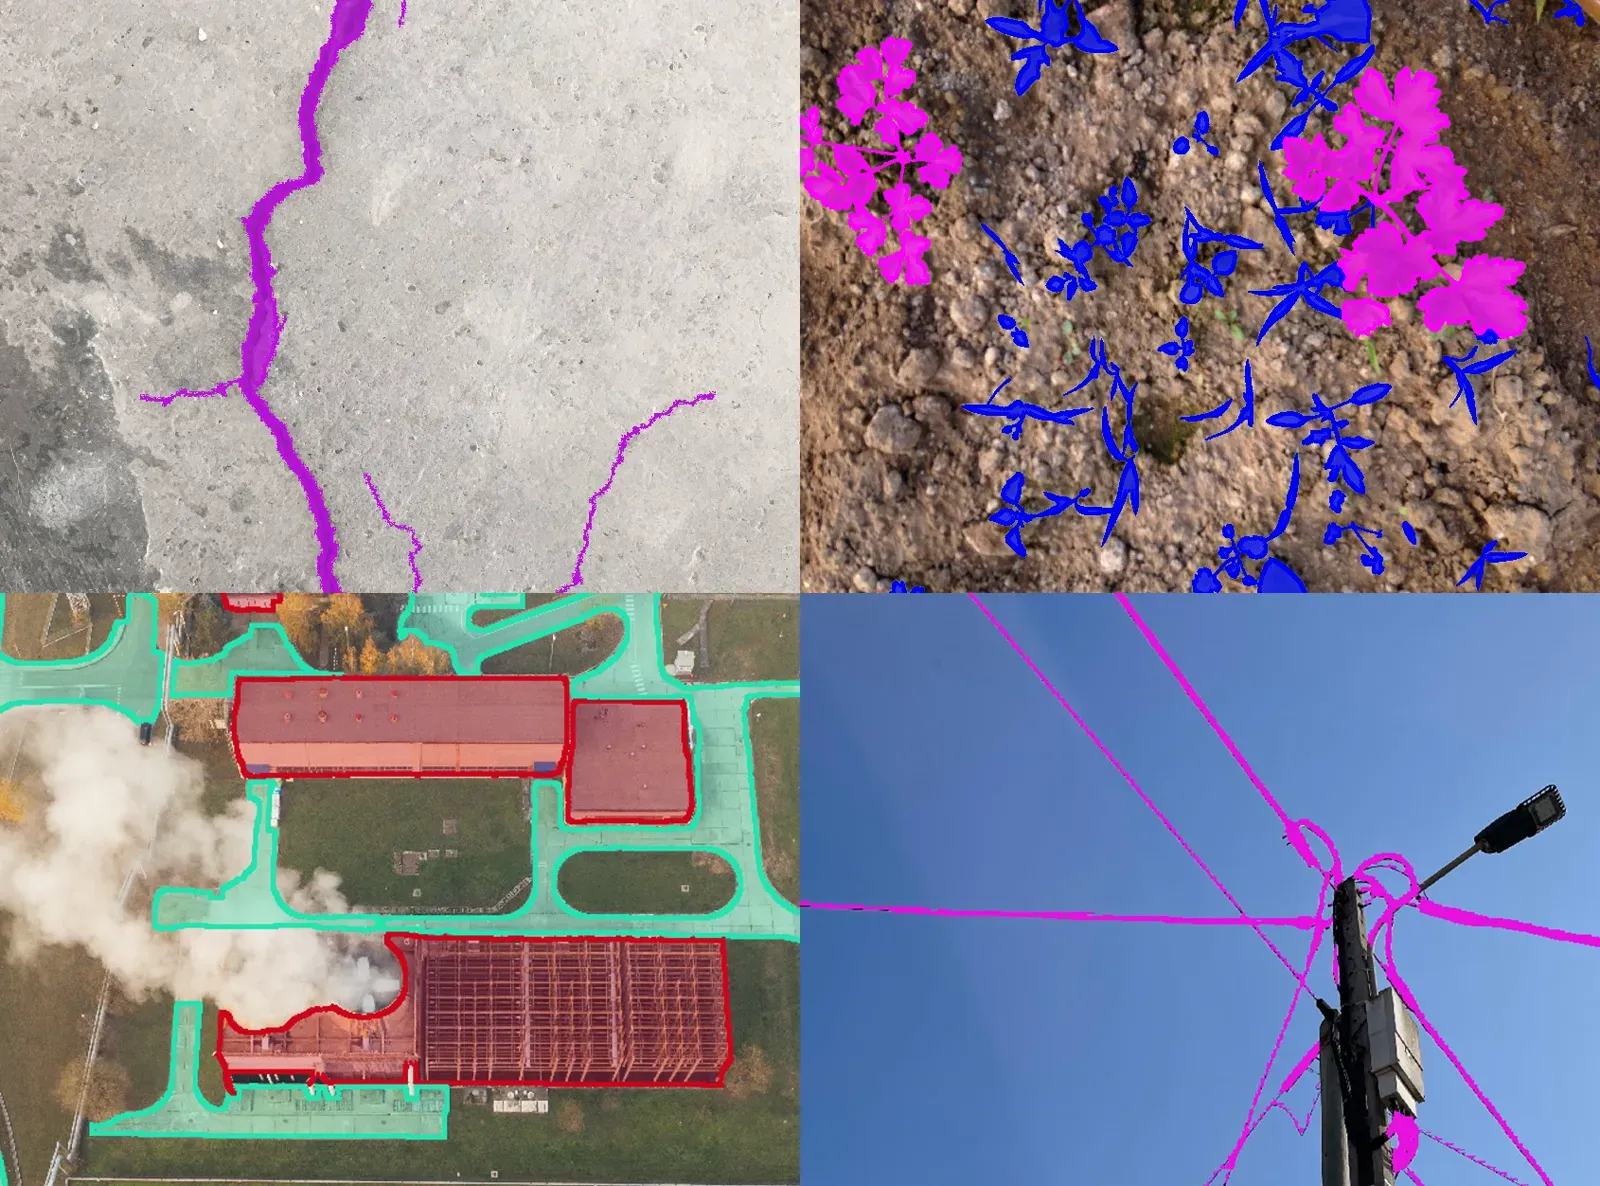 Using a custom model to segment objects such as cracks in concrete, carrot sprouts, infrastructure, and wires on poles.
Where it helps:
- Plant phenotyping and agriculture: disease and defect detection, yield estimation.
- Infrastructure inspection and construction: cracks, wires and structures.
- Medical imaging: faster labeling of images, with experts reviewing the result.
How much faster is a custom model than SAM or RITM?
We compared pretrained SAM, pretrained RITM and a custom RITM on 50 objects: 25 potato plants and 25 weeds. The custom model was trained on the same kind of images, with selectively labeled objects.
| Method | Manual | RITM | SAM | Custom RITM |
|---|---|---|---|---|
| Number of clicks | 7122 | 278 | 237 | 18 |
| Time in Smart Tool | - | 19 mins | 23 mins | 12 mins |
| Correction clicks | - | 615 | 2840 | 163 |
| Correction time | - | 10 mins | 40 mins | 3 mins |
| Total time on the dataset | 190 mins | 32 mins | 66 mins | 18 mins |
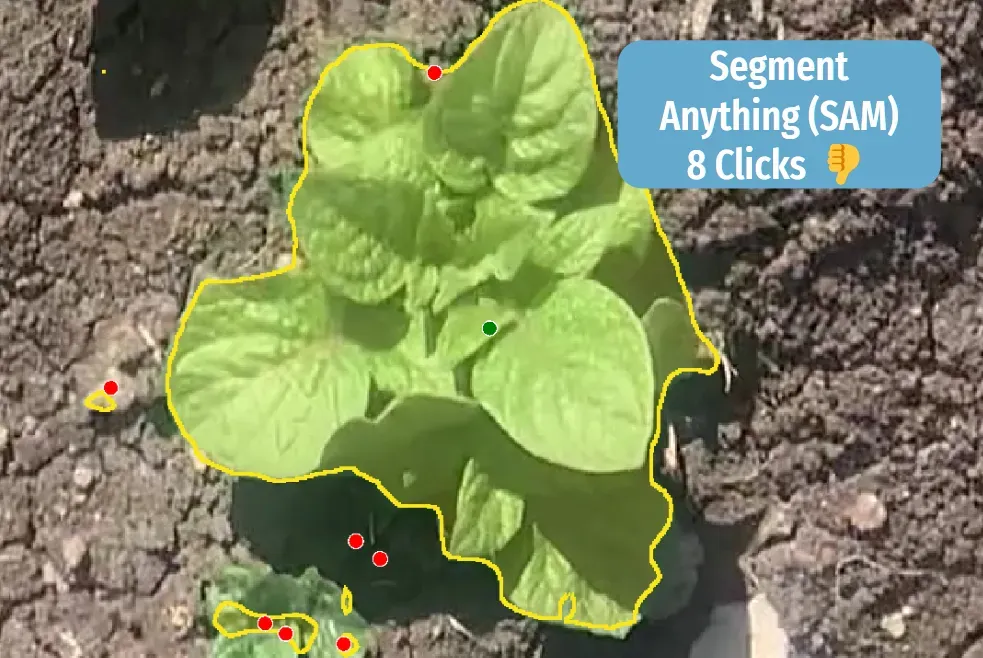
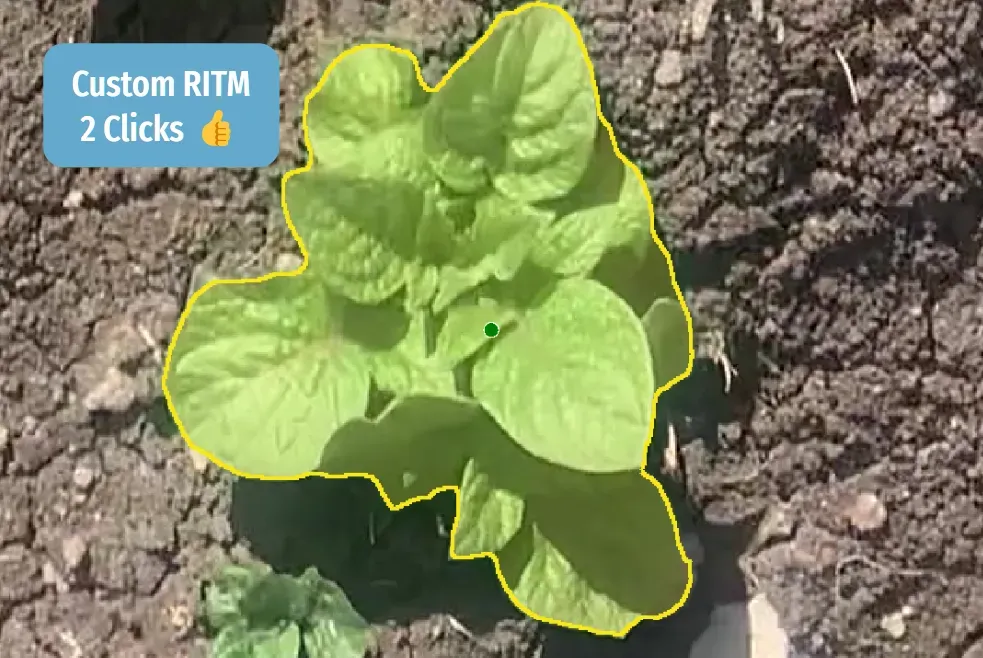
The custom model needed about 3.7 times less time than SAM (18 against 66 minutes) and more than 10 times less than manual labeling (18 against 190 minutes). SAM did worse than RITM in this test, mostly because its masks needed 2840 correction clicks. This is one experiment on one kind of plant. Treat it as a method to repeat on your data, not as a general ranking.
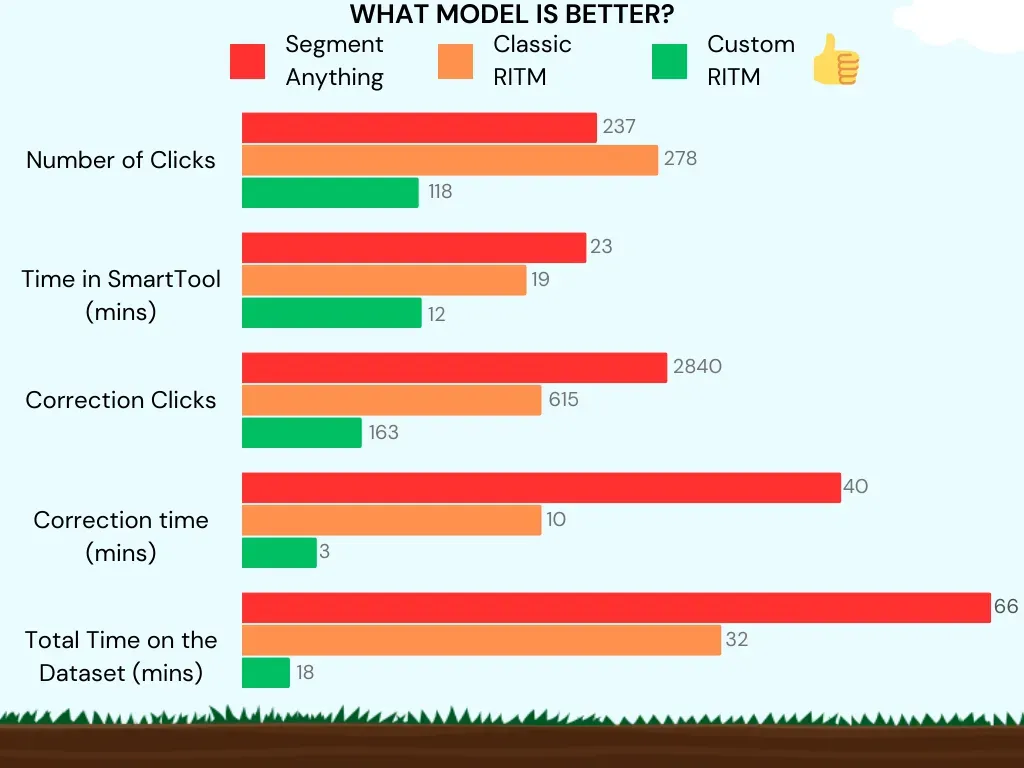 The performance of the Custom model is the best among others. Color coding: Green indicates excellent, orange signifies average, and red means poor.
Can I train a custom Smart Tool without code?
Yes. Supervisely turns it into a short pipeline. The post covers two experiments with the same method.
| Wheat | Potato and weeds | |
|---|---|---|
| Task | Semantic segmentation of wheat plants | Instance segmentation of potato and weed leaves |
| Training data | 142 labeled images, plus 24 validation images | 210 potato and 466 weed objects, labeled selectively |
| Source | ETH Zurich Research Collection | Open dataset on Dataset Ninja |
| Model | RITM | RITM, (COCO) HRNet18 IT-M |
| Special setting | Default | Instance segmentation with Crop to Fit an Instance Object |
The steps:
- Collect unlabeled images that are typical for your task.
- Selectively label images that show the specific aspects of your task. You do not need a fully labeled dataset.
- Run Train RITM on the labeled project.
- Deploy the checkpoint with the serving app.
- Label with the custom model in the toolbox.
You can repeat step 2 with the new model to grow the dataset and improve the model. The same platform covers other models too. See AI-assisted labeling and model training and serving.
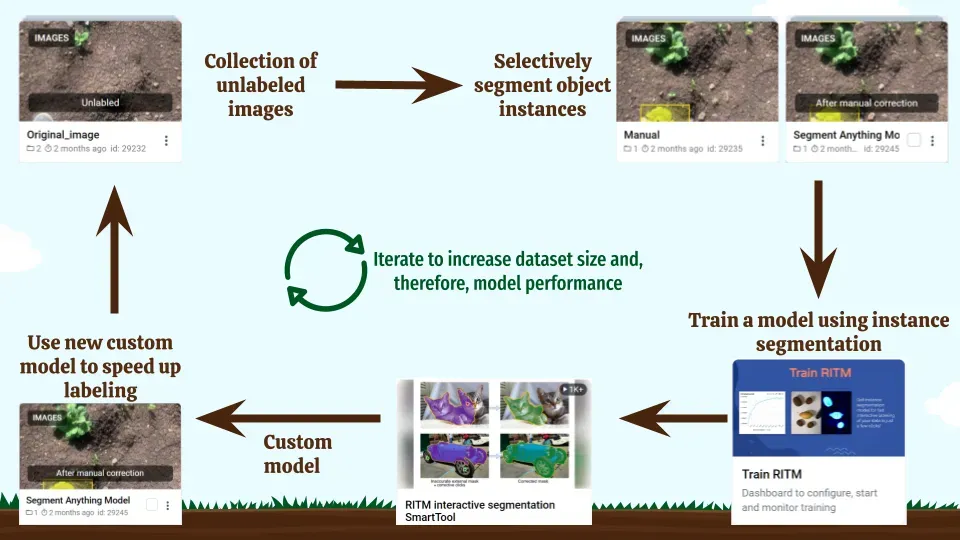 The process of creating a custom Instance Segmentation Model.
Video tutorials:
The 12-minute wheat video below covers semantic segmentation, the comparison with public models, and training without code.
Do out-of-the-box models work on agricultural images?
The wheat images come from a research collection at ETH Zurich. They are hard on purpose: low quality, shadows and difficult light. Add two demo projects (train and test) to your account and follow along:
Train dataset - Eschikon Wheat Segmentation (EWS)
Images of wheat for training and validation
Test dataset - Eschikon Wheat Segmentation (EWS)
Wheat images for test
The training set has 142 labeled images. A separate test set holds unseen images with new lighting and angles, and a validation set of 24 images is used during training to tune the model.
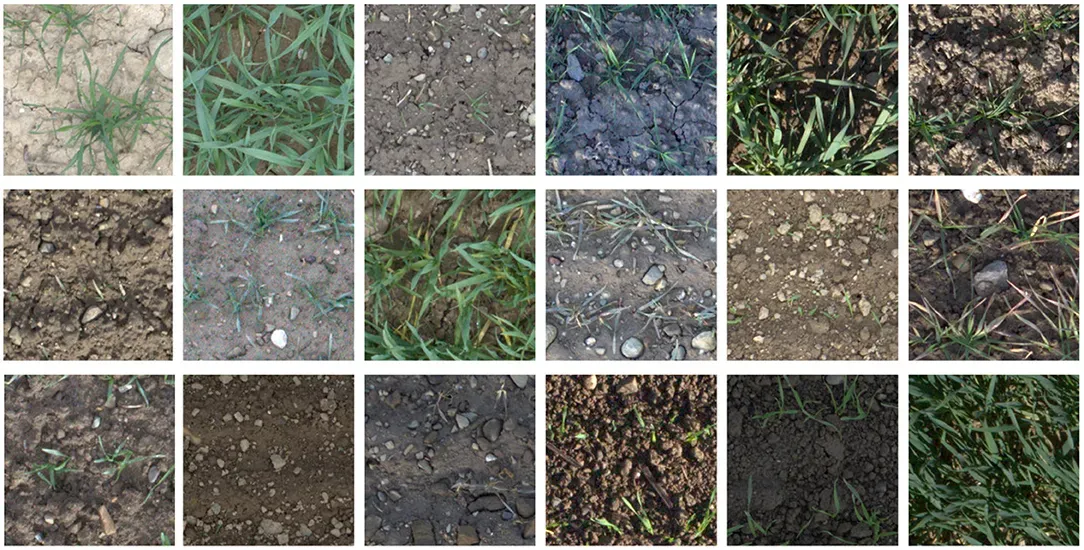 Test dataset
First we tried RITM, ClickSEG and Segment Anything on these images.
All three left masks incomplete or inaccurate, even after many clicks. That is the case for a custom model.
How do I train a custom model step by step?
What you need: a Supervisely account (the Community Edition is free), labeled images, and a computer with a GPU.
Step 1. Prepare and label the data
Collect a diverse set of images. The potato and weed dataset is on Dataset Ninja.


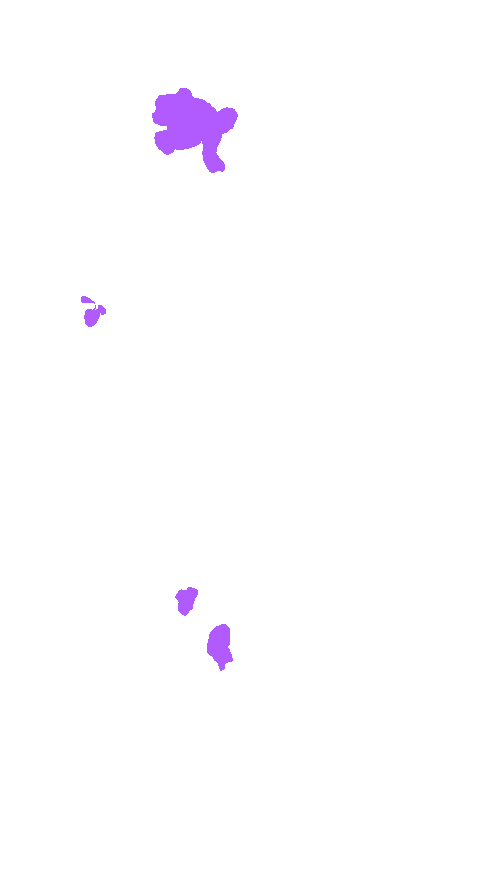
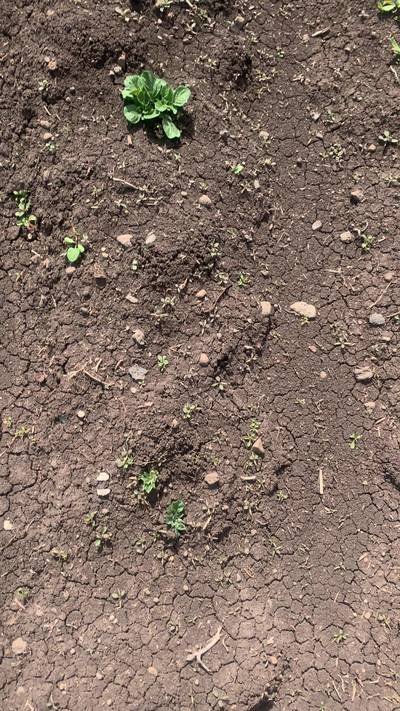
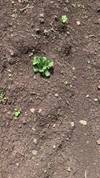
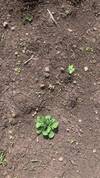
Supervisely Potatoes
The Supervisely Potatoes Dataset for Crops and Weed Segmentation is tailored for the agricultural task of crop recognition. It encompasses the visual data of potato leaves (crop) and various types of weed objects. More than just a resource for training models, this dataset serves as a robust benchmark for evaluating the efficiency of pre-trained models..
Get in Dataset Ninja
Normally you label whole images to train a model. With instance segmentation you can label selected objects only, and that is enough to train an interactive model.
Step 2. Connect a computer with a GPU
You can connect your own GPU computer to the platform for training, inference and evaluation. It takes one command in a terminal. See How to connect agents and the video tutorial.
Step 3. Train the model
Run Train RITM from the context menu of the labeled project: click [⫶] → Neural Networks → RITM → Train RITM. See also the docs on how to train models.
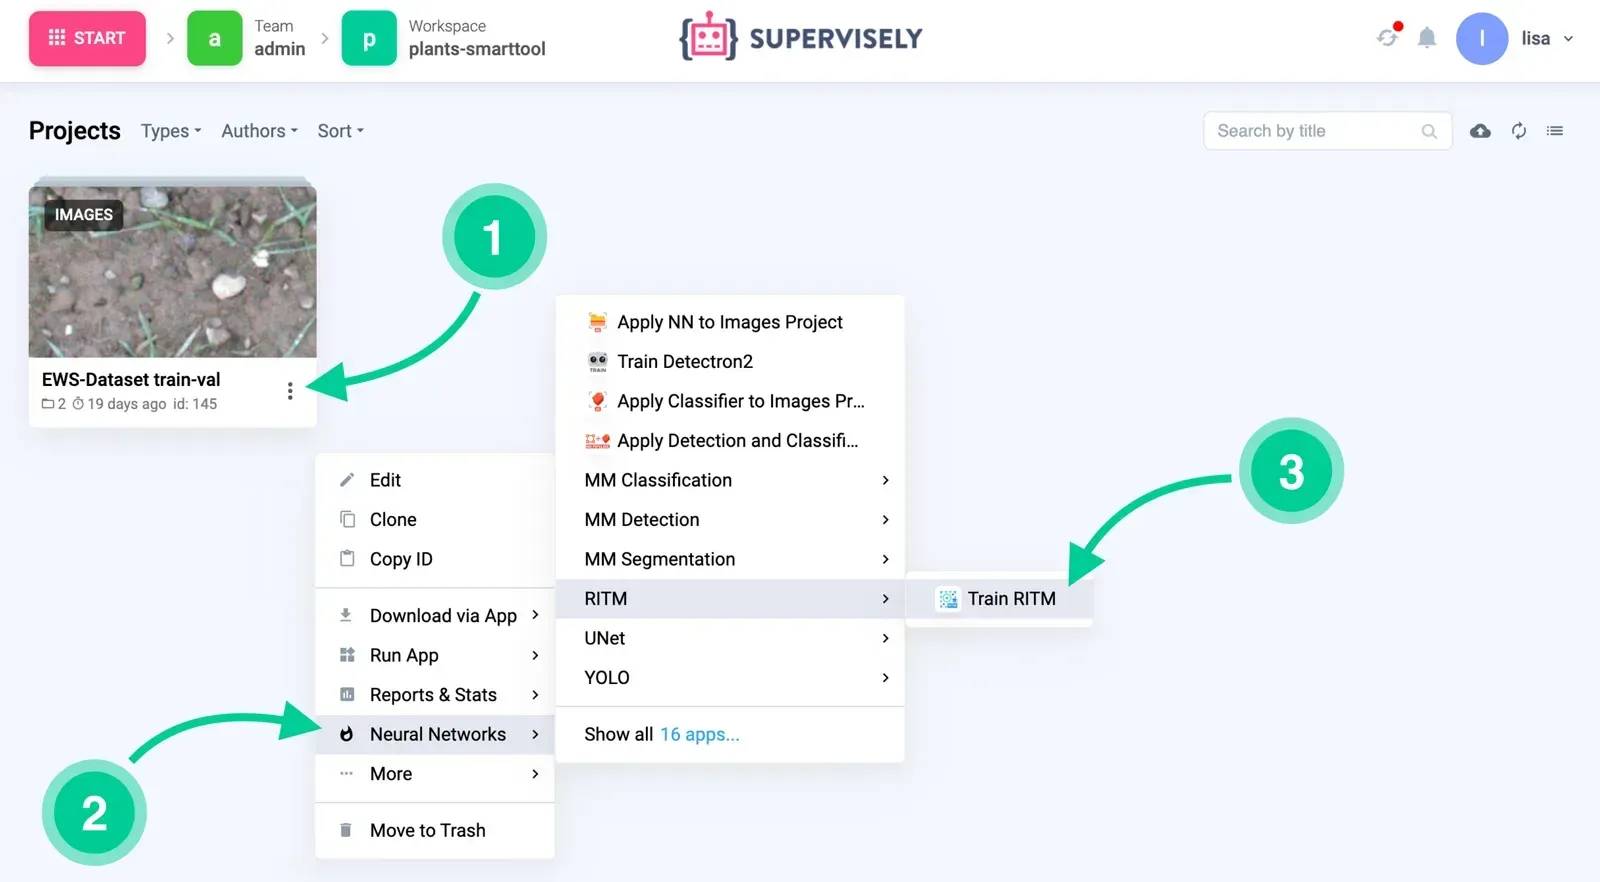 How to run the RITM training App from your custom training dataset
The wizard asks for classes, train and validation splits, a model architecture and hyperparameters such as augmentations, pretrained weights, epochs, batch size, workers per GPU, checkpoint interval and learning rate.
For the potato and weed model, we selected Instance segmentation and Crop to Fit an Instance Object. Instance segmentation outlines each object and creates separate masks even for overlapping objects. Crop to fit keeps the objects whole and uses only labeled objects for training.
| Training hyperparameter | Value |
|---|---|
| Model | (COCO) HRNet18 IT-M |
| Input size | 512 x 512 |
| Number of objects | 466 weed and 210 potato |
| Number of epochs | 20 |
| Batch size | 6 |
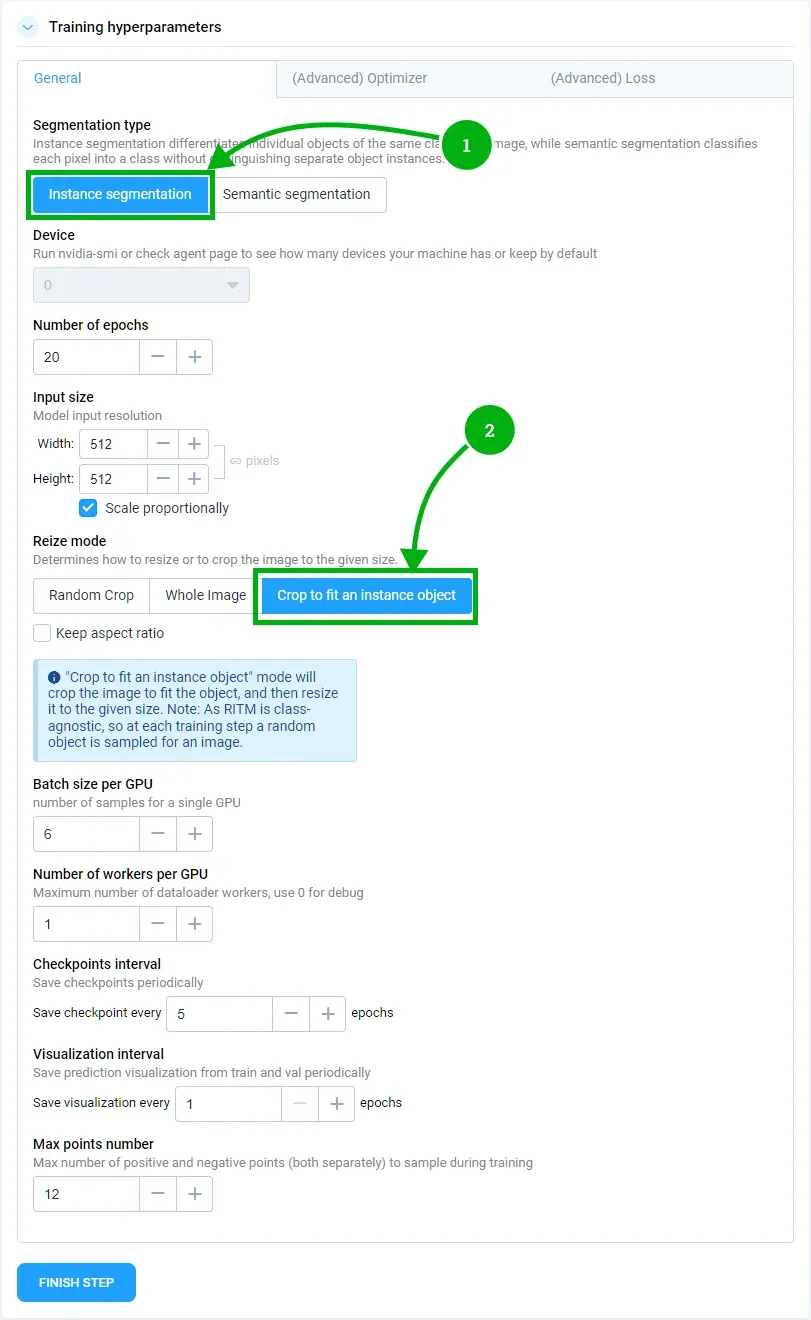 Training hyperparameters
Press Train and watch logs, charts and visualizations. A healthy run looks like this:
- The learning rate falls gradually and smoothly.
- The training loss goes down over time.
- The validation adaptive IoU precision goes up.
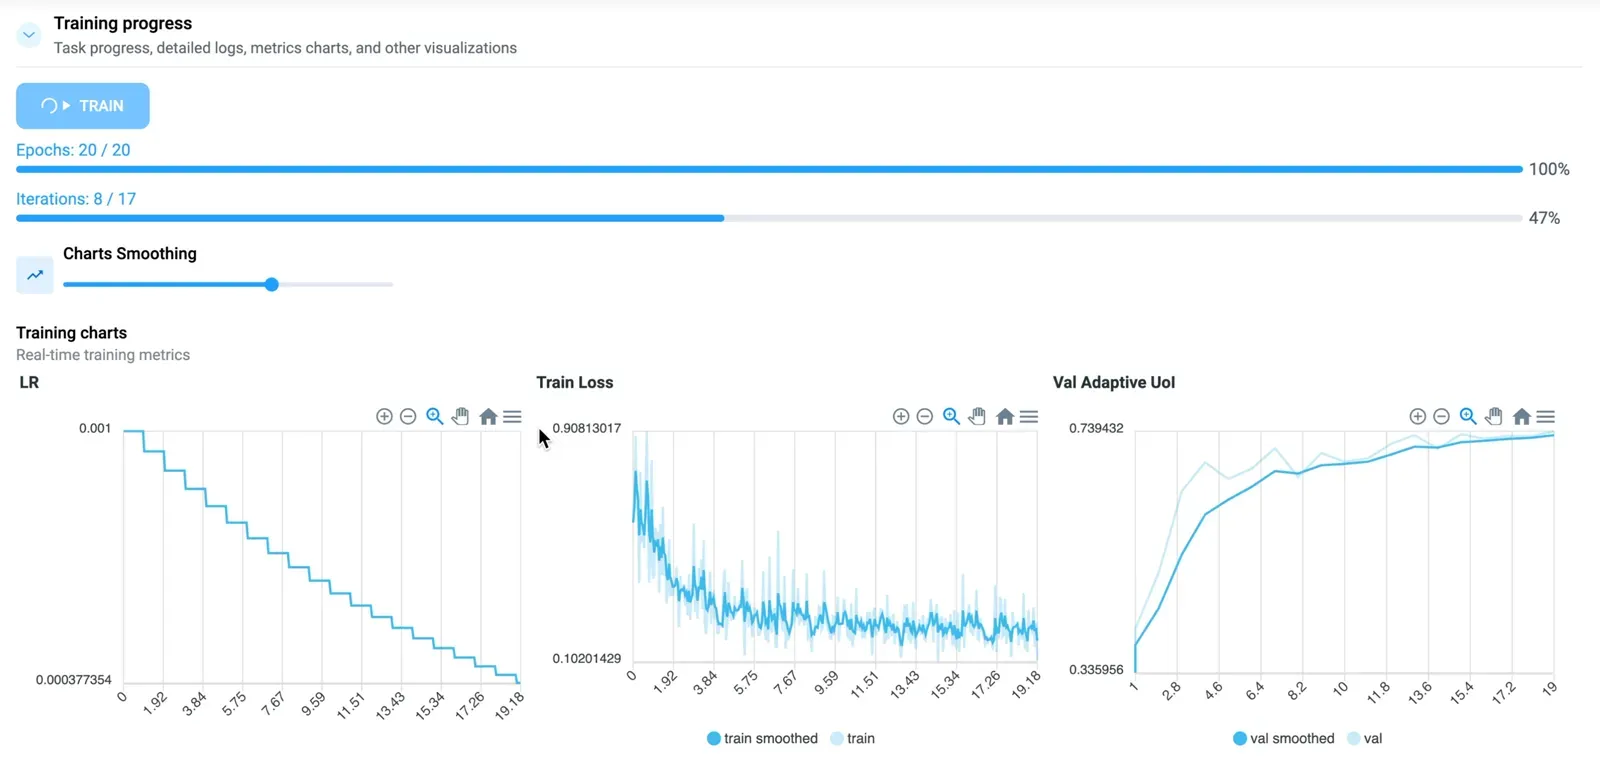 Training visualisations
Training time depends on the GPU. In the wheat run it took up to 15 minutes. At the end the app offers to train for 5 more epochs or to finish.
The app saves artifacts to Team Files in the RITM_training folder: the best checkpoint, the last checkpoint, and checkpoints at the interval you set. Checkpoints are saved every 5 epochs by default in the wheat run. Every team member can use these files.
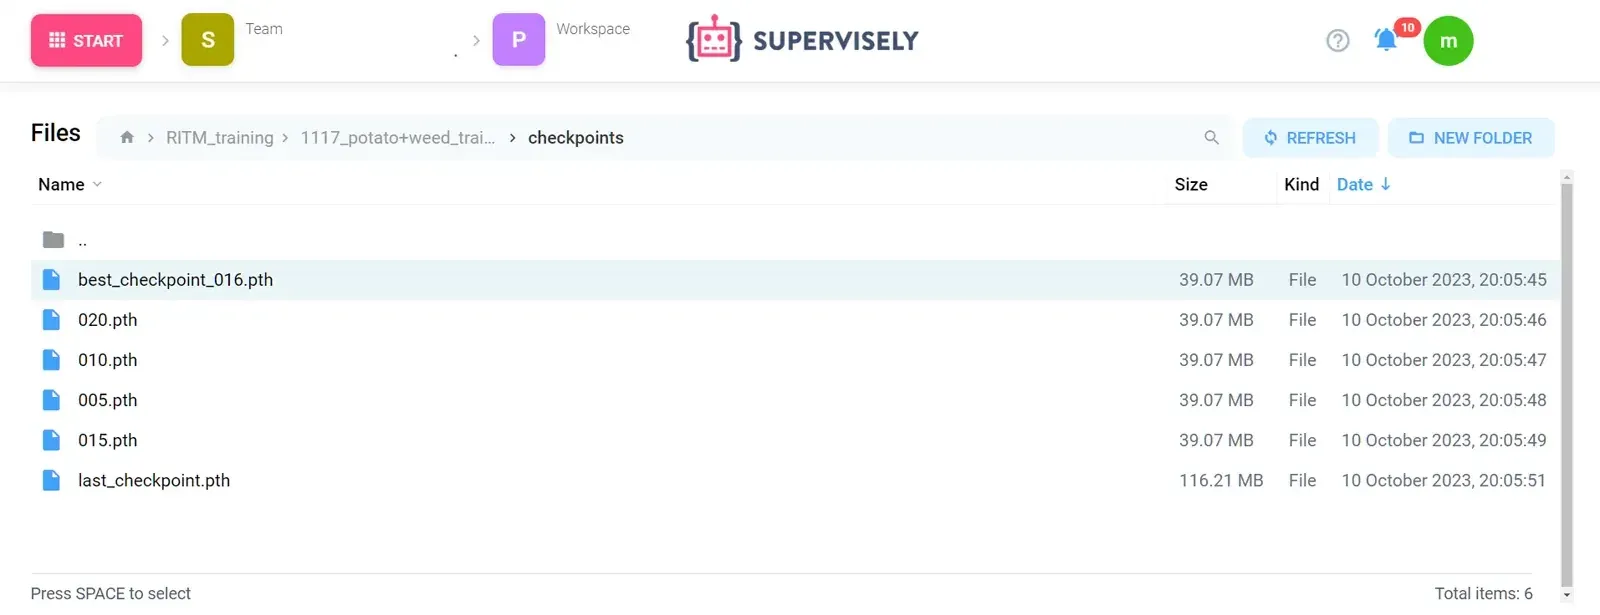 Model checkpoints in TeamFiles
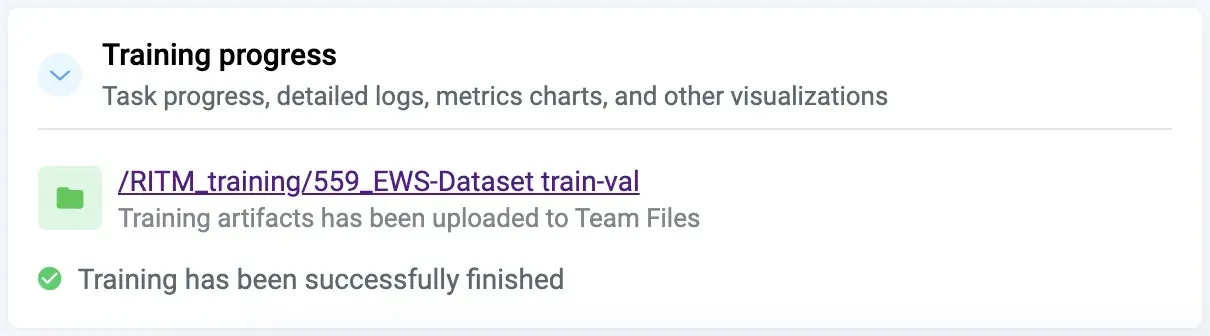 Model predictions are saved to your account to Team Files
Step 4. Deploy the custom model
Neural networks in Supervisely come as two kinds of apps: train and serve. The train app is the training dashboard. The serve app deploys the trained model as a REST API, so Python code and other apps can send images and get predictions. More in the Neural Networks catalog.
- Open
RITM_training→Name of your project→checkpoints, choose a checkpoint (we recommendbest_checkpoint) and copy its path. - Run
Neural Networks→Images→Interactive Segmentation→Serve RITM, selectCustomand paste the path. Give the model a recognizable name, for examplecustom-wheat-smtool.

RITM interactive segmentation SmartTool
State-of-the art object segmentation model in Labeling Interface
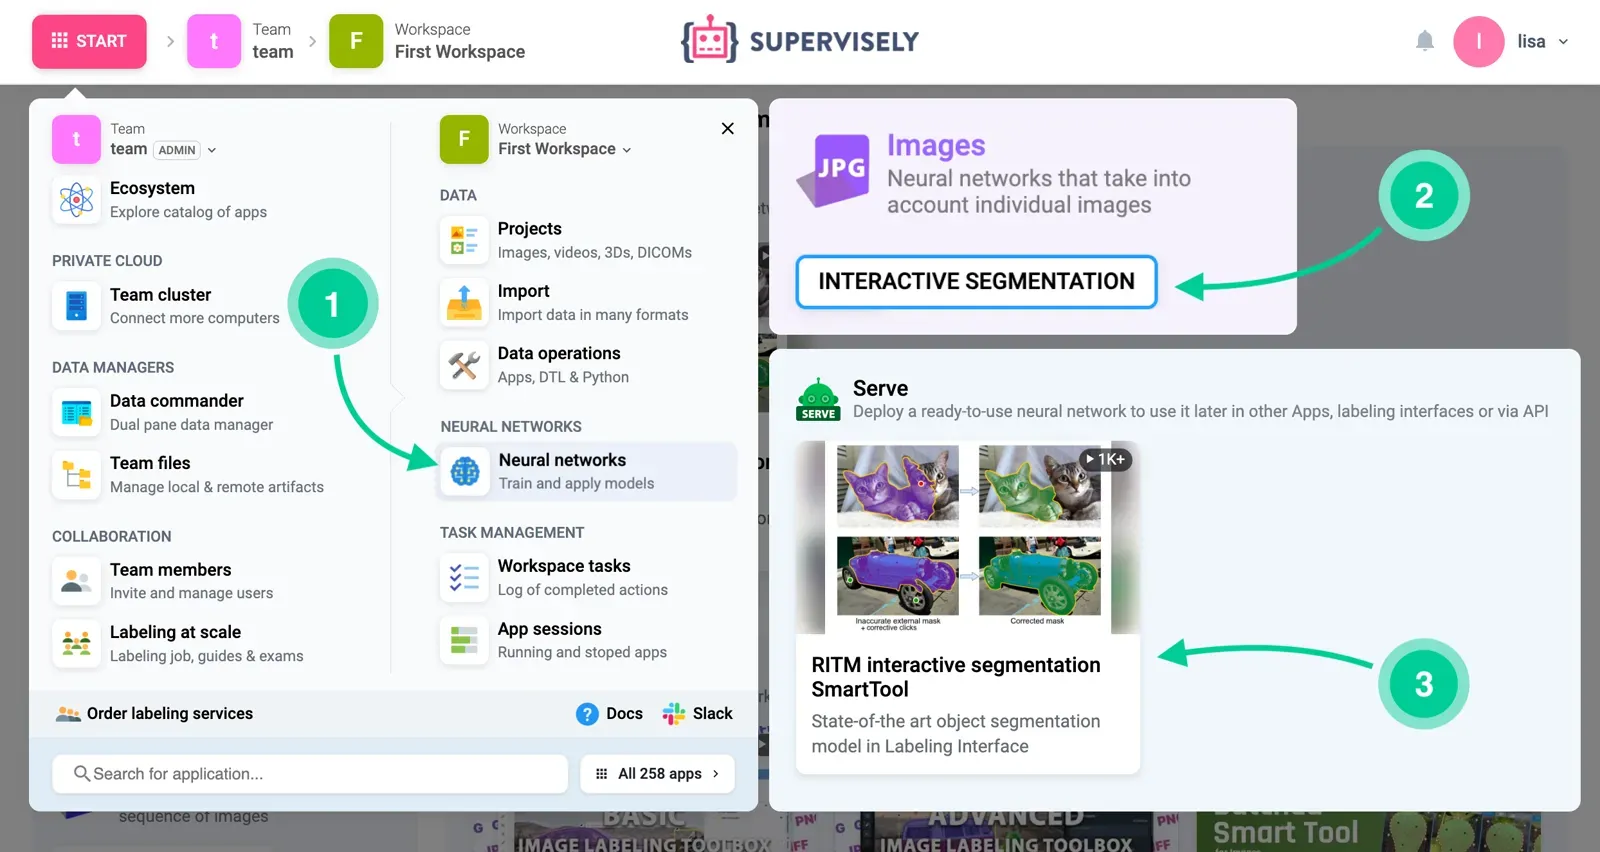 How to run the RITM serving App
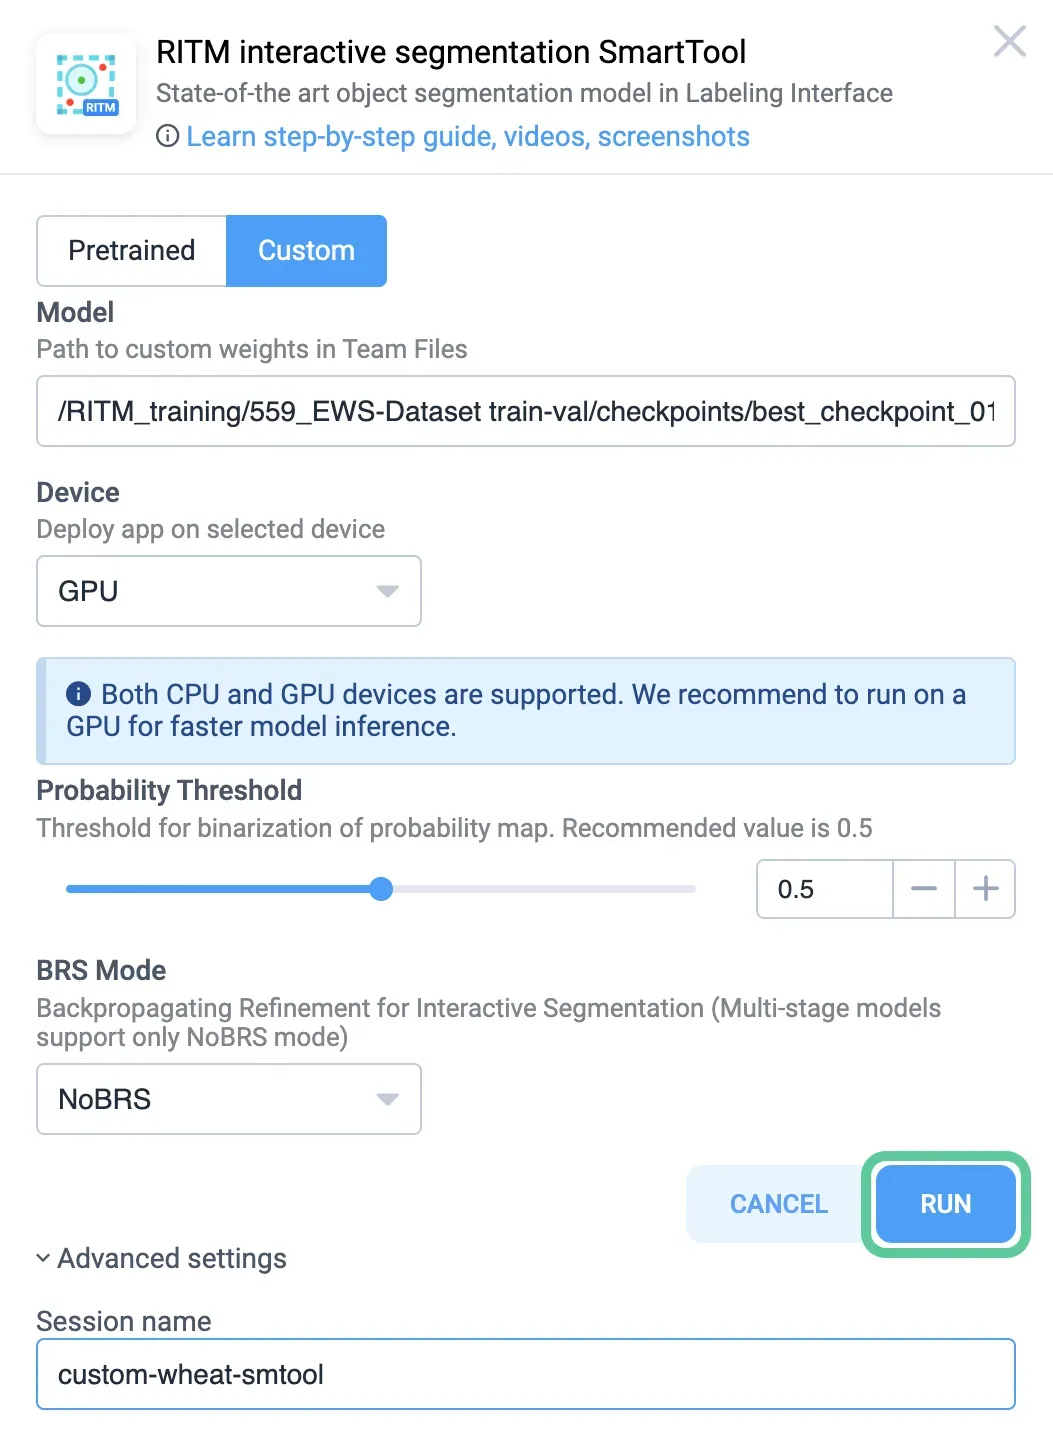 Provide a custom checkpoint you want to run
Step 5. Label with the custom model
Open the test dataset and add a class, for example "wheat". In the Smart Tool selection window pick standard or custom and switch with one click to compare. Add positive 🟢 and negative 🔴 clicks to fine-tune a mask.
Step 6. Iterate
Check where the model is wrong, label more images with its help, add them to the training set and train again. Each round needs less manual work, and you can add classes without relabeling the whole dataset.
When should I use a custom model, SAM or manual labeling?
| Situation | Best choice |
|---|---|
| Everyday objects, few images | SAM or the standard RITM from the Smart Tool |
| Thousands of images of one domain (plants, defects, cracks) | Custom RITM model |
| Fine edges that AI keeps missing | Fix with the Mask Pen or Brush |
| Many different objects, no time to train | Zero-shot detection or SAM-based tools |
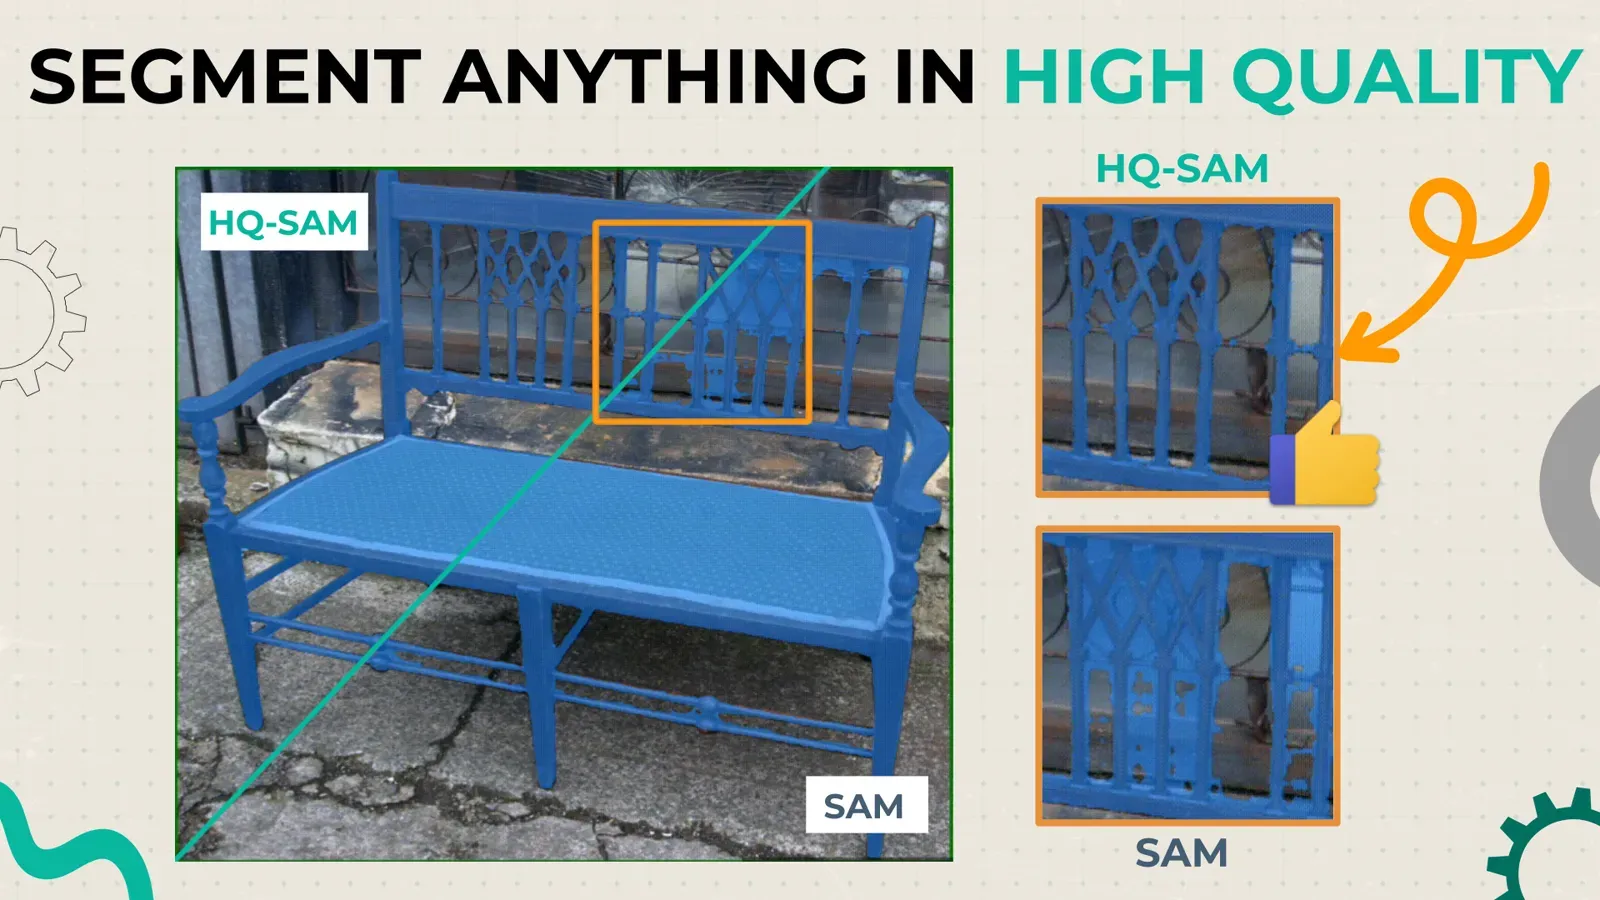
Other examples of custom models: crack segmentation. For other SAM versions, see HQ-SAM and SAM 2. For the basics of the tool, read the Smart Tool guide.
Questions? Ask in the public Slack or write to hello@supervisely.com.
Frequently asked questions
What is a custom interactive segmentation model?
It is a click-based segmentation model, such as RITM, that you train on your own labeled images. You click once to segment the main body of an object and add positive or negative clicks to fix mistakes. Because it learned your images, it needs fewer clicks than a generic model.
Is SAM or a custom RITM model better for labeling?
It depends on the data. SAM is a strong general model trained on 11 million images, and it works without training. In our plant experiment a custom RITM model took 18 minutes for the whole dataset, RITM 32 and SAM 66, with 3 minutes of corrections for the custom model against 40 for SAM. Test both on a sample of your own images.
How many images do I need to train a custom Smart Tool?
Less than you may expect. The wheat model used 142 training images and 24 validation images. The potato and weed model used 210 potato and 466 weed objects, selectively labeled, not every object in every image. Add more data later and retrain if the results are not good enough.
Do I need to write code or own a GPU?
No code is needed, because training runs as a Supervisely app with a wizard. You need a GPU, either on your own computer connected to the platform as an agent or on your server.
What is the difference between instance and semantic segmentation for training?
Semantic segmentation assigns every pixel a class and does not separate neighbors of the same class. Instance segmentation outlines each object separately, even when objects overlap. The wheat model used the semantic setting. The potato and weed model used the Instance setting with crop-to-fit, so only labeled objects are used for training.
Can I improve the model after the first training?
Yes. Label more images with the new model, add them to the training set and train again. Each round needs less manual work and you can add classes without relabeling everything.