
Video Annotation Tool 3.0: AI Auto Tracking, Tags and Timelines
 Denis DrozdovUpdated
What is new in Supervisely Video Annotation 3.0: AI auto tracking, one-checkbox frame tags, an Objects & Tags timeline, trajectories and a white theme.
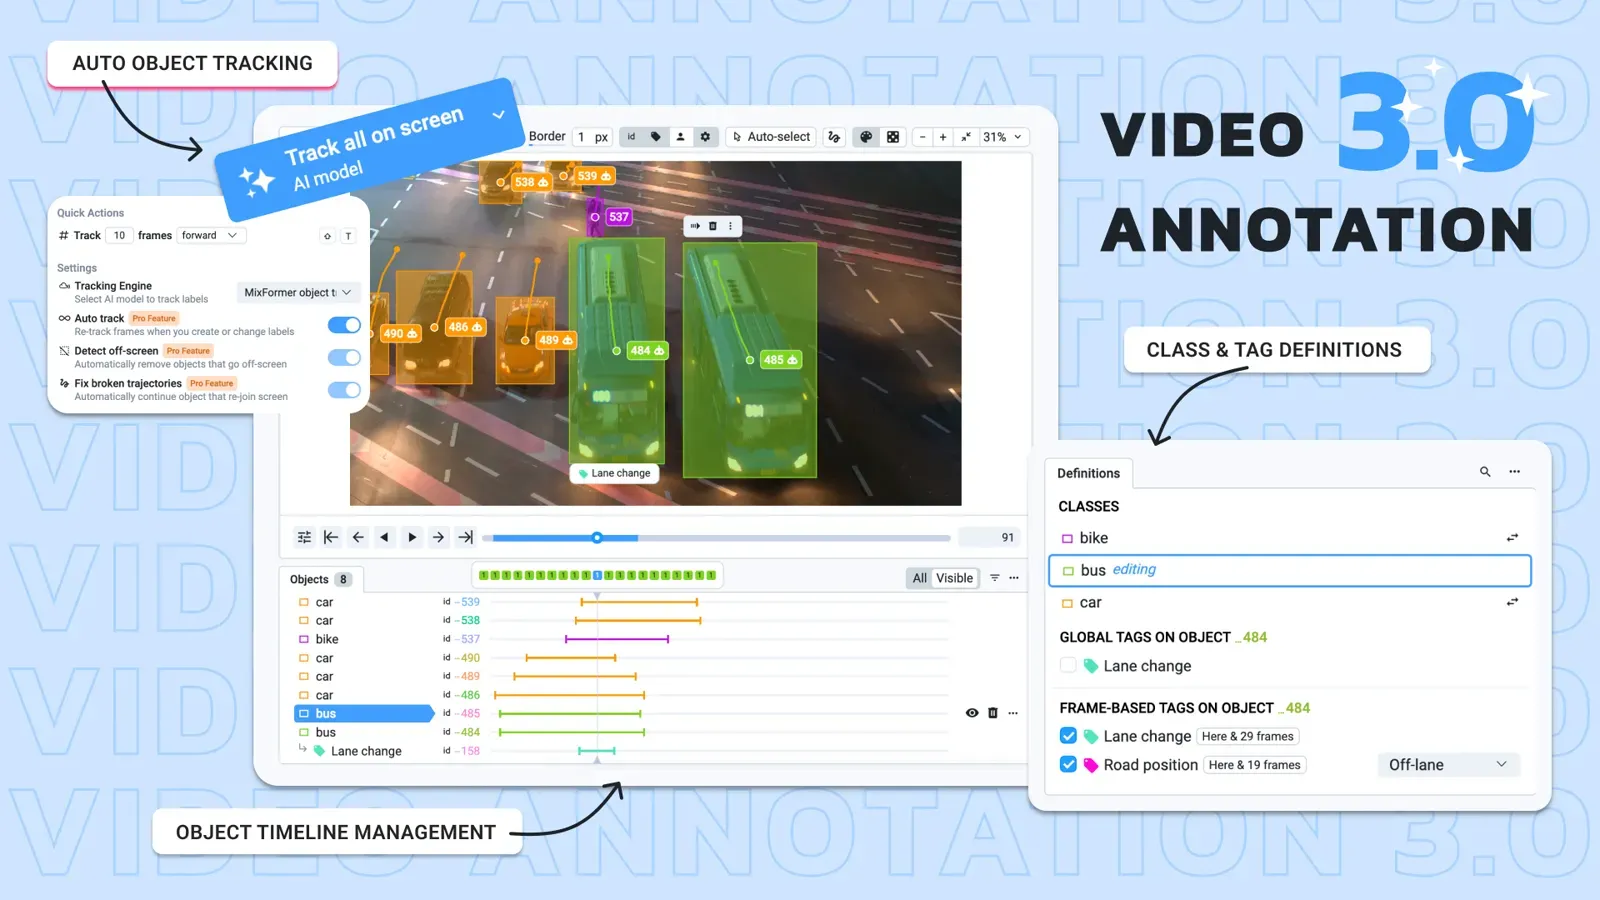
Supervisely Video Annotation Toolbox 3.0 is a video labeling tool that tracks objects with AI, tags frame ranges with one checkbox and shows all objects and tags on one timeline. It works on whole videos without splitting them into frames. This post walks through the new features of the video labeling toolbox; the docs cover each panel in detail.
What changed in Video Annotation 3.0?
Video labeling is more than labeling many frames. You also have to keep track of the relationships between frames, for example when tracking objects or tagging segments. The Supervisely video toolbox handles this without splitting videos into individual frames.
The timeline view gives precise control over where labels and tags are placed. Integrated object tracking neural networks automate much of the tracking work.
Based on user feedback, we made two changes. Tracking models now do more than predict the next bounding box. And a single timeline is not enough: it helps to see all objects and attached tags in one view.
The result is Supervisely Video Annotation Toolbox 3.0.
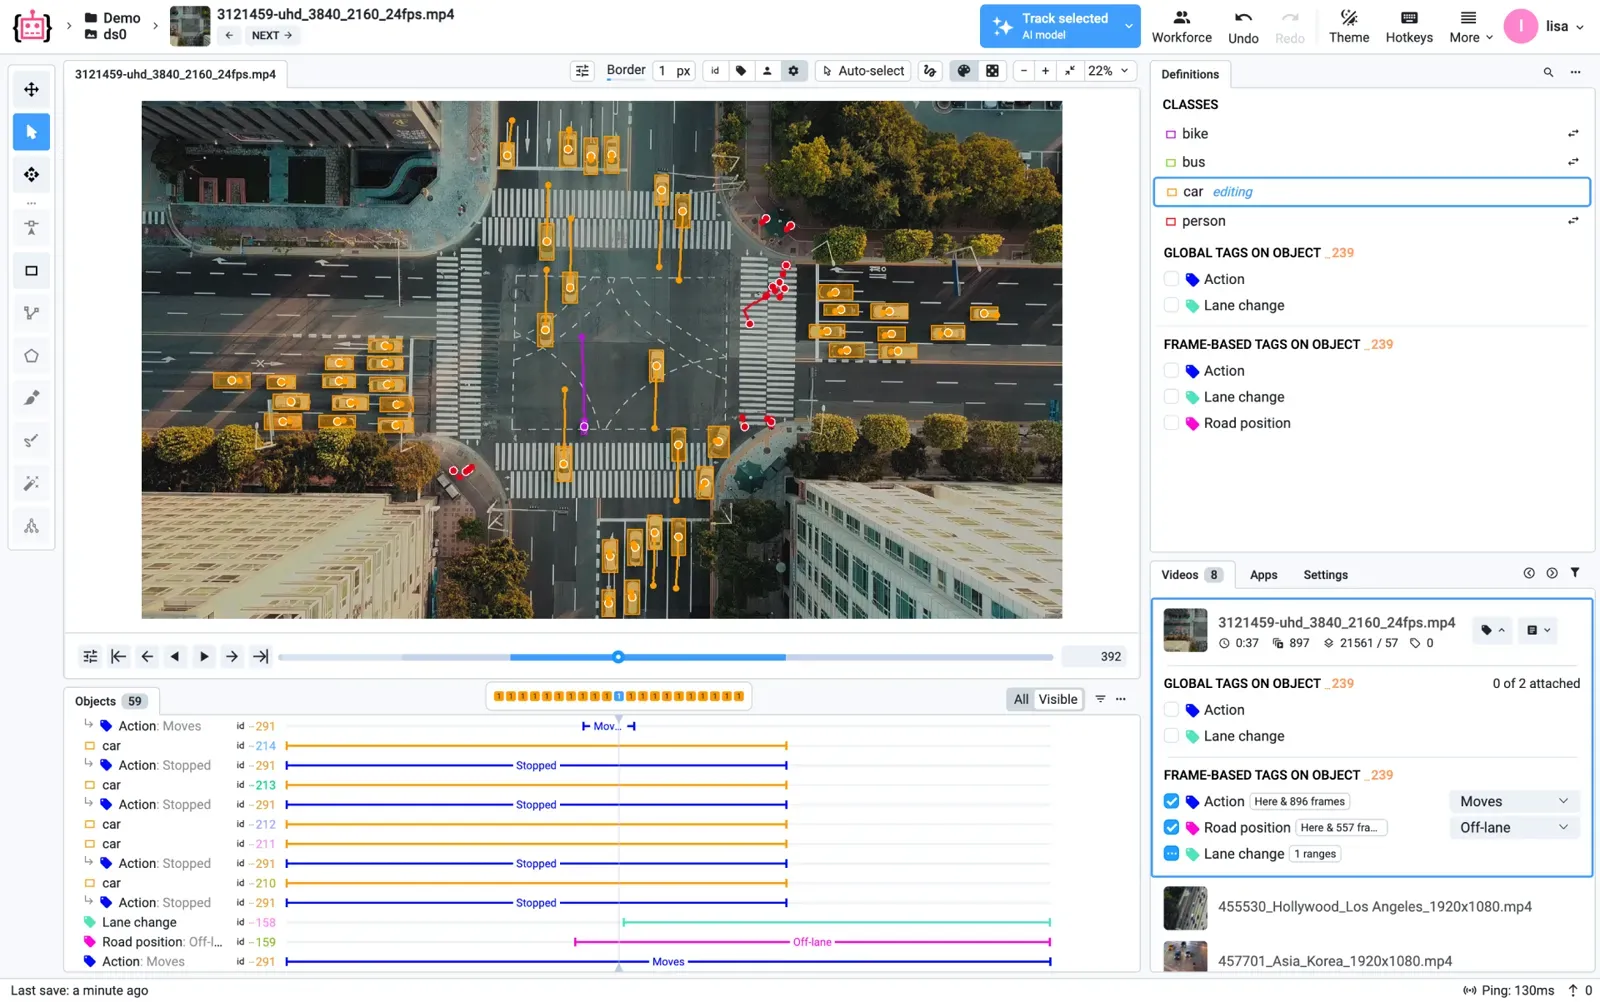 Video Annotation Toolbox 3.0
How does Auto Tracking work?
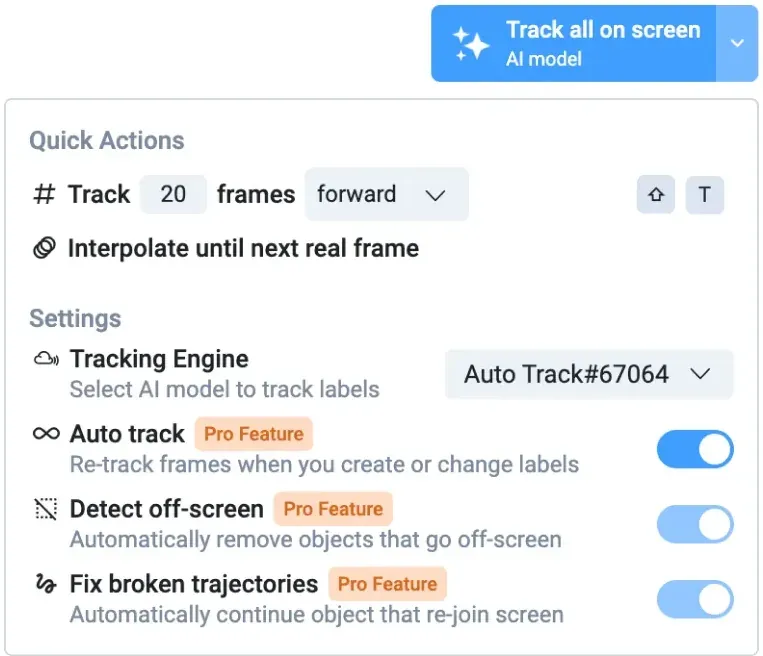
Auto Tracking is the main feature of this update. It is powered by Supervisely Apps that work on top of existing tracking apps from our ecosystem, such as MixFormer. Auto Tracking selects the model based on the type of geometry you’re working with — whether it’s a bounding box, skeleton, mask, or other types.
As you move through your video or modify labels, Auto Tracking predicts labels automatically. It can also detect when an object leaves the scene and stop tracking it.
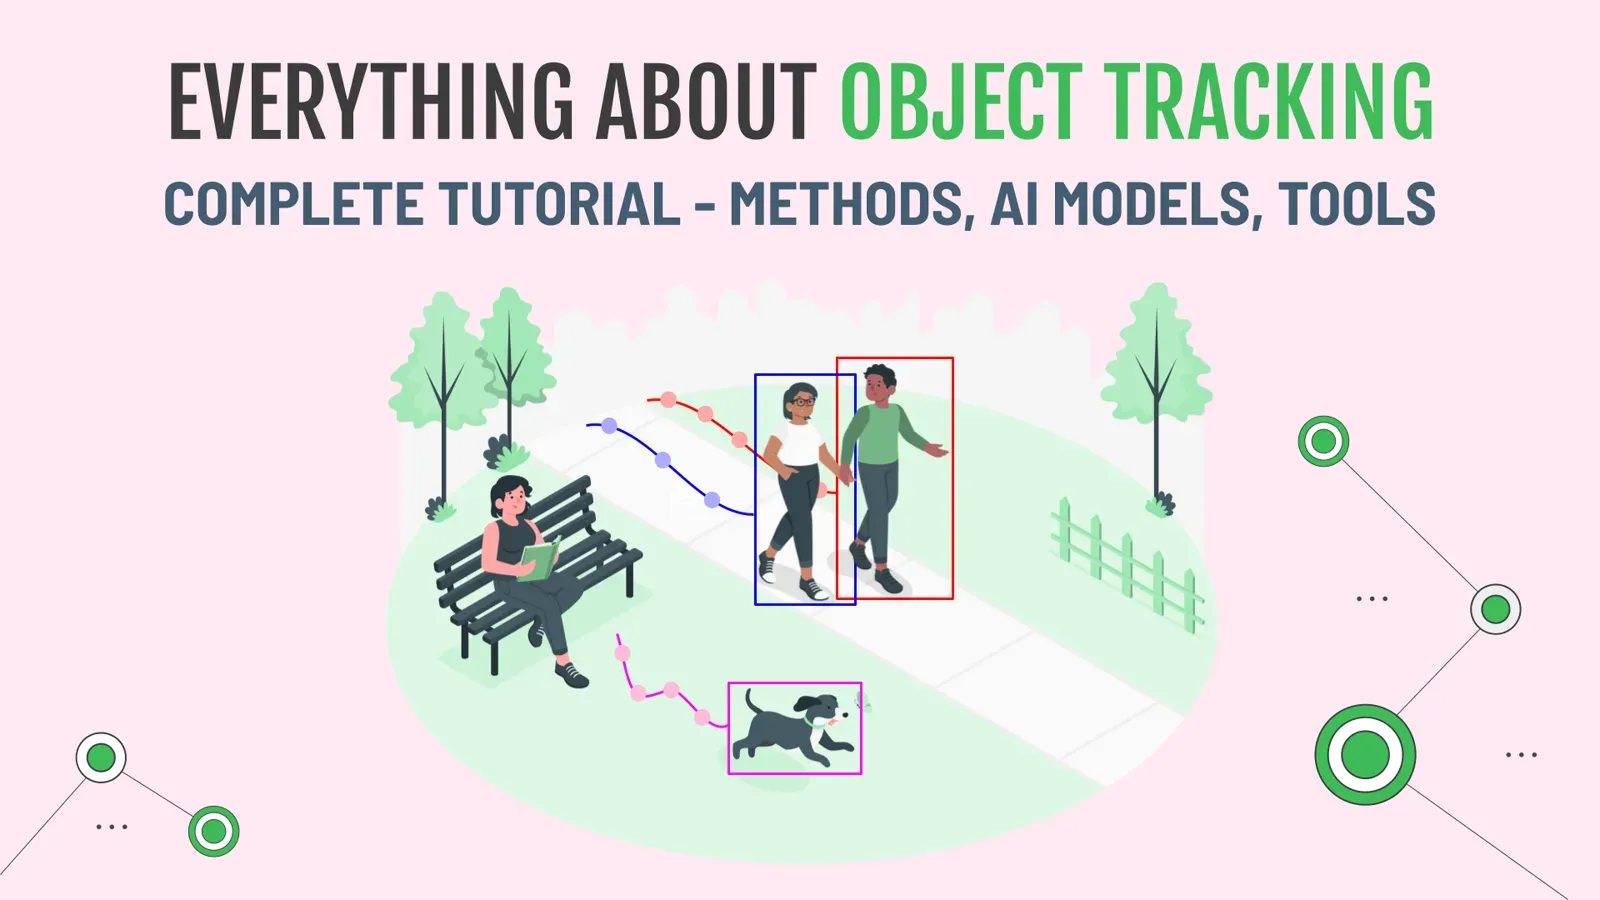
If you need something simpler, Auto Tracking also supports interpolation, which remains useful in many scenarios. For a deeper look at tracking models, see the object tracking guide and the XMem tutorial.
Combined with models that pre-detect objects in a scene, you create fewer labels manually.
You can try this feature on our free community server or contact us for a trial!
What is new in the Definitions Panel?
In Video Toolbox 3.0, the Definitions Panel has been revamped for video labeling, building on what we’ve previously introduced for image labeling (see advanced dataset filters). It’s even more useful for video projects.
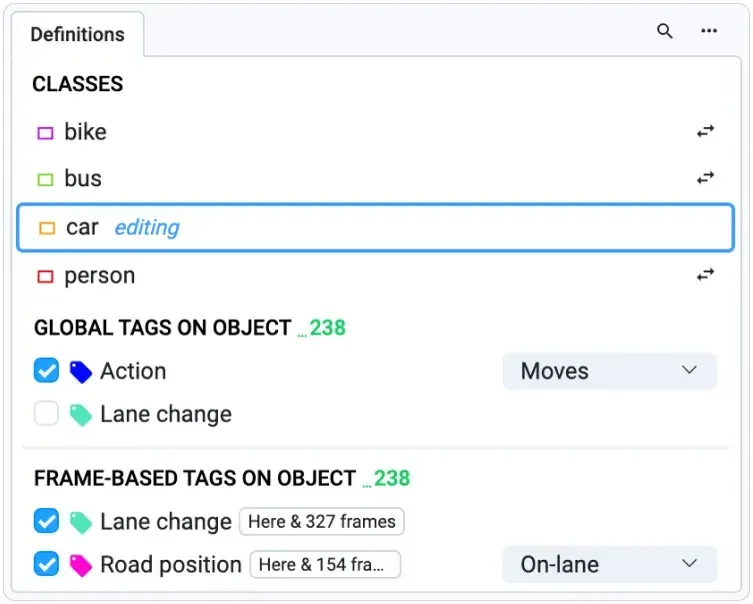 Definitions panel
Just like with image labeling, you can now quickly search for classes and start labeling right away without needing to manually select the appropriate tool. All your classes of labels are presented clearly on your screen for fast access.
For video, we’ve added the ability to assign tags globally or frame-by-frame. Global tags can be applied to entire videos or specific objects, while frame-based tags let you mark specific ranges. You can even configure whether a tag is assigned only to the video, only to objects, or both. Global tags are assigned as usual: to the selected annotation object or to the current video, if none selected.
In previous versions, this was done by clicking the "clip" icon near the tag.
How do you tag video frames and segments?
Frame-based tagging used to require quite a few steps. You had to click the "mark frames" button, select a tag, and manually mark the range on a zoomed timeline. Assigning the same tag across multiple segments would create multiple instances, which added complexity when you wanted to edit or review them:
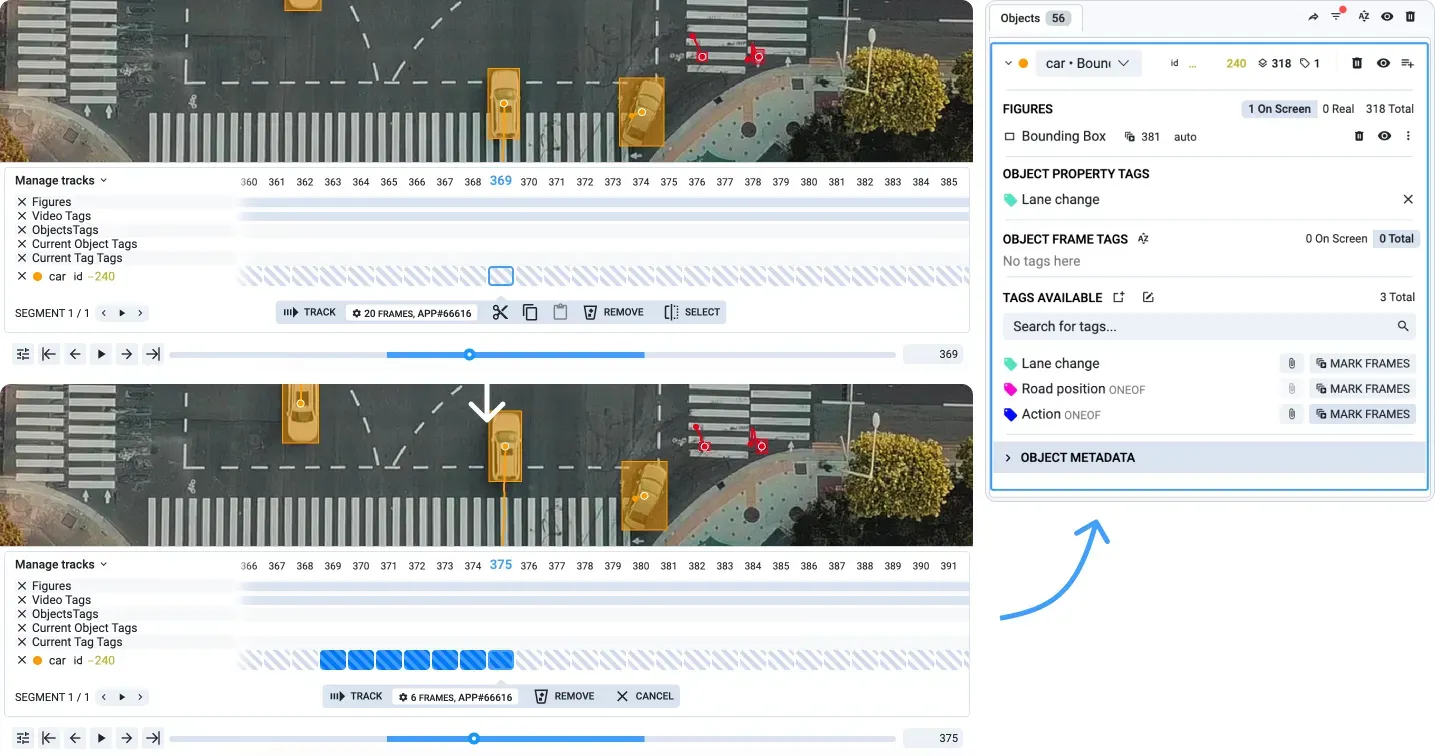 Tagging in Video Annotation 2.0 (previous version)
In Video Toolbox 3.0, tagging frames takes fewer steps. Simply check the box for a tag on the current frame, and a modal window will appear asking where you want to place it. By default, it will apply from the current frame to the end, which covers most cases.
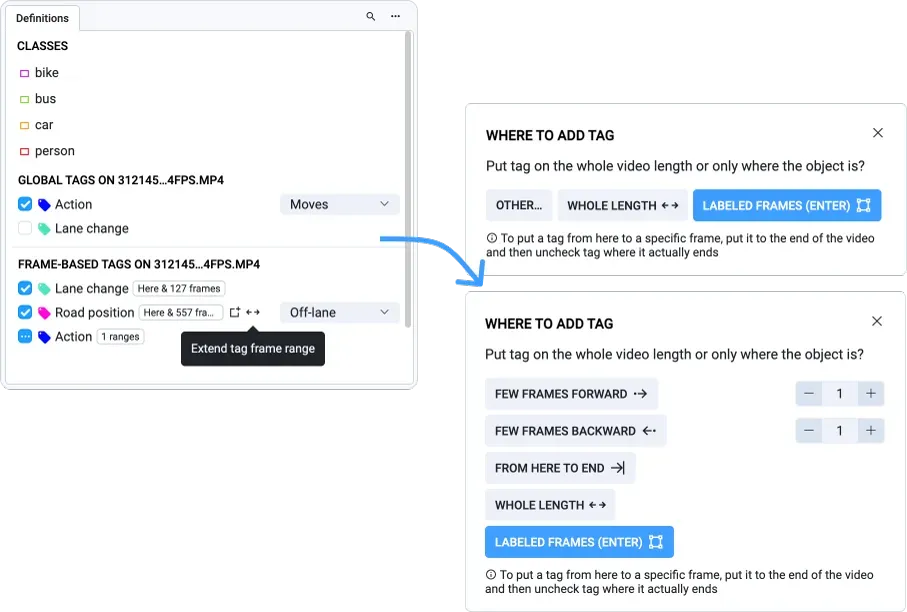 Click checkbox to start tag range
This creates a new segment of the tag assigned to the selected annotation object or the current video. Other options include assigning it from frame 0 to the video end or specifying an exact length.
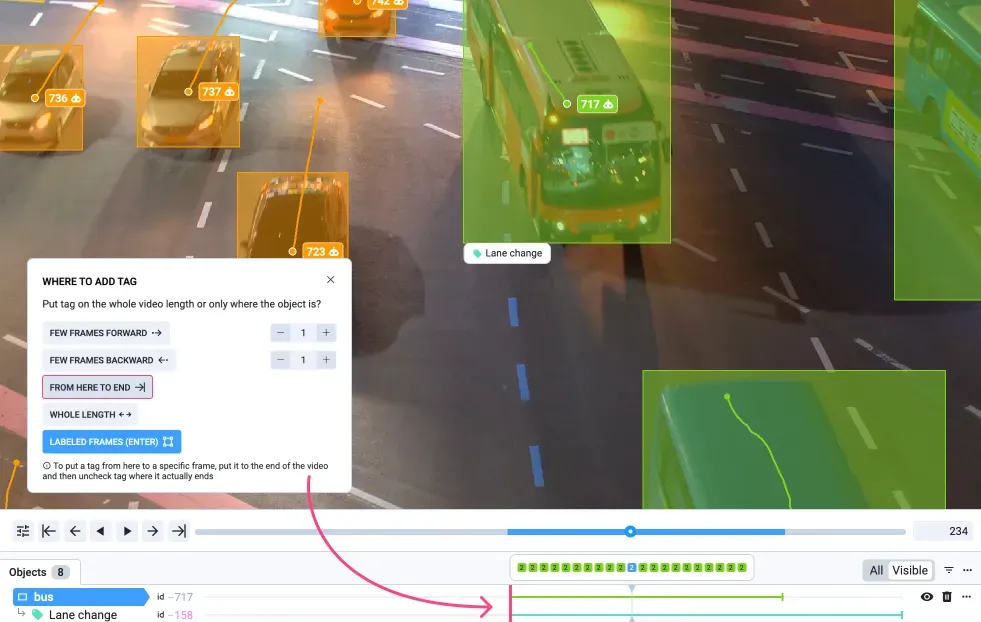 Timeline helps to visually see where tag ranges are
Need to stop the tag at a certain frame? Just uncheck the box, and you’ll be prompted with an option to clear it from that point forward.
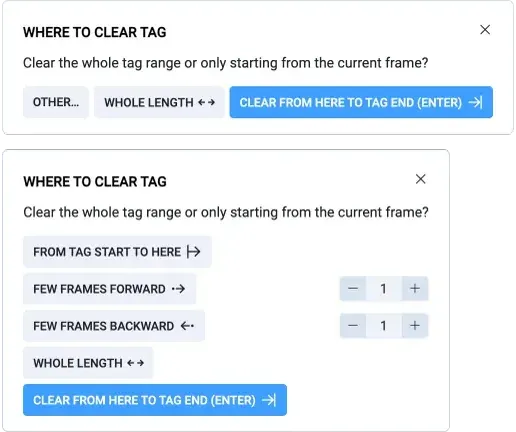
This new method simplifies the process — just watch the video, check when the tag starts, and uncheck when it ends. No more fiddling with zoomed timelines or selecting specific modes. And if a tag comes and goes throughout the video, you can easily add and remove it as needed.

Modifying the tag value works similarly — just hover over the tag value input or double-click the segment in the Objects & Tags panel to adjust it. By default, we’ll split the tag into a new segment, making changes quick and straightforward.

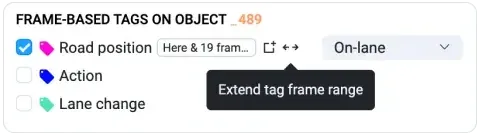
You can even attach the same tag to multiple frames if needed, which is handy for scenarios like consensus labeling. We’ve also added an "extend" button for quick adjustments to tag ranges without needing to rewind through the video.
What are the new Objects & Tags timelines?
Video Toolbox 3.0 also adds an Objects & Tags panel. Instead of relying on a single, zoomed-in timeline (which only shows about 50 frames at a time), this panel gives you a clear overview of all objects and tags throughout the entire video. You can easily jump to specific segments, adjust tag values, or use various actions from the context menu.

We’ve kept the floating zoomed timeline as well, but now it’s much smaller and designed to help you focus on precision while the Objects & Tags Panel gives you the full picture. You may click on the interesting frame or use your mouse scroll.

How do Trajectories help catch labeling mistakes?
Labelers or AI models can sometimes confuse objects and assign bounding boxes incorrectly. The new Trajectories view helps catch this. It visualizes object movement and is especially useful with static cameras. This makes it easy to spot mistakes, as you'll clearly see how trajectories jump between different objects.
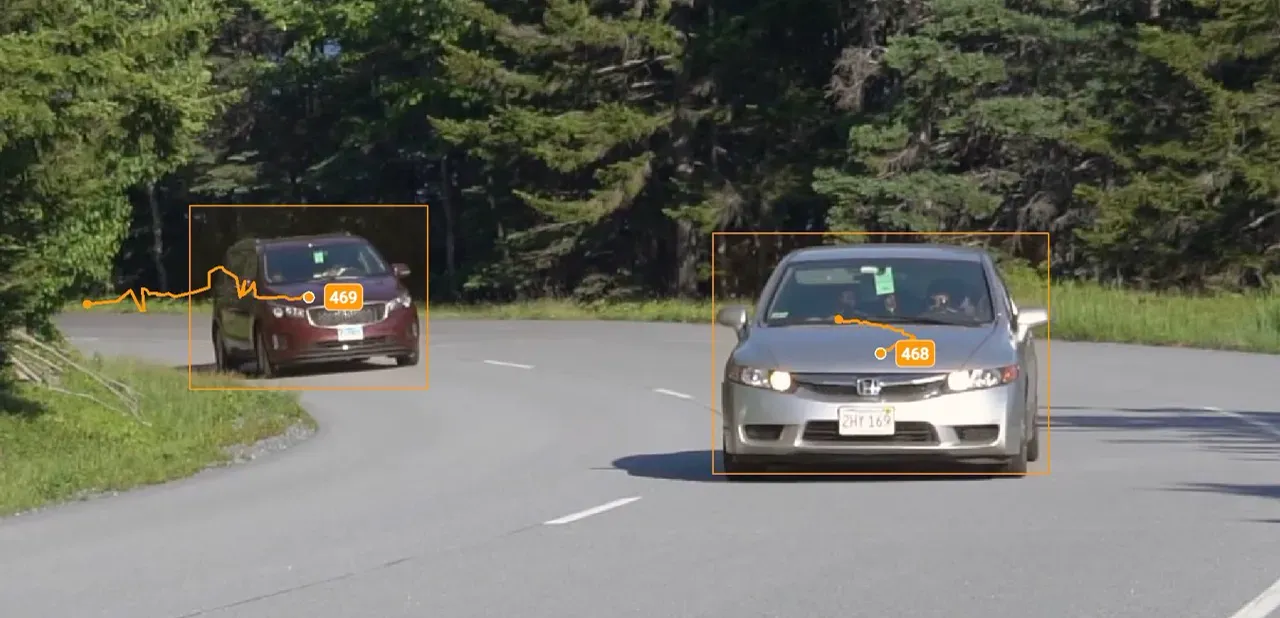 Normal trajectories
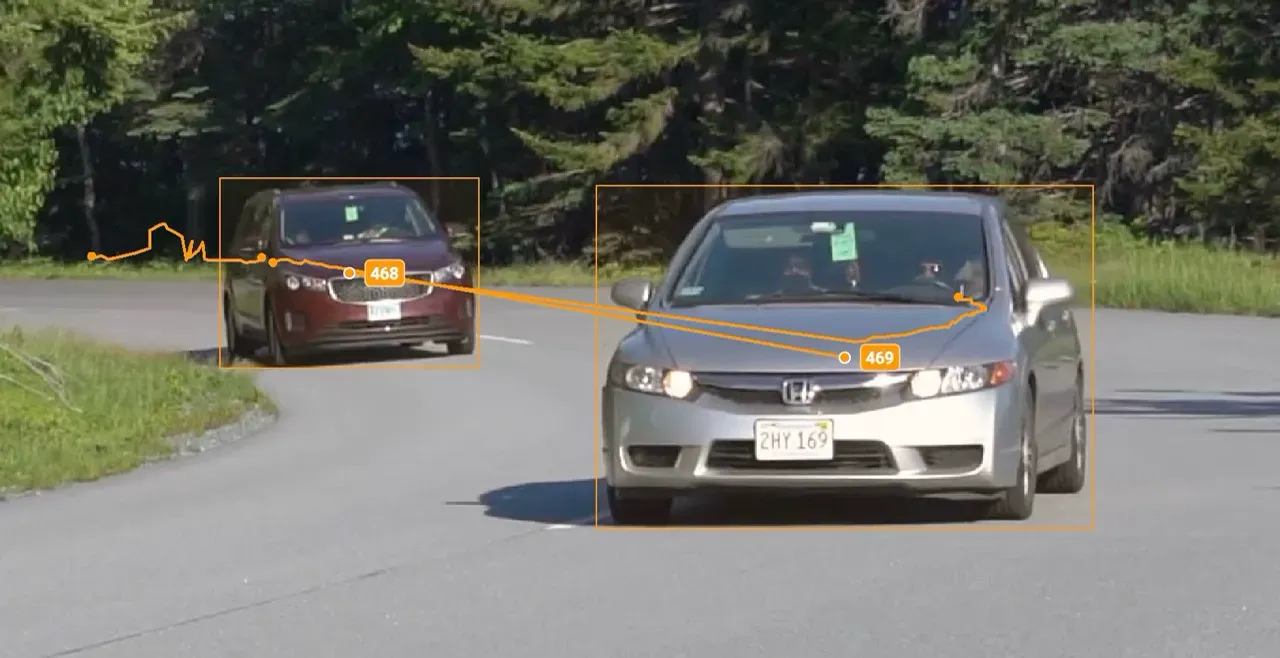 Detection mistake
Quick Actions
With hundreds of objects across thousands of frames, cursor travel adds up. Video Annotation 3.0 adds a floating quick actions panel that appears right next to the annotation object. With minimal effort, you can quickly perform tasks like moving a bounding box to another object, deleting it from the current frame onward, and much more.
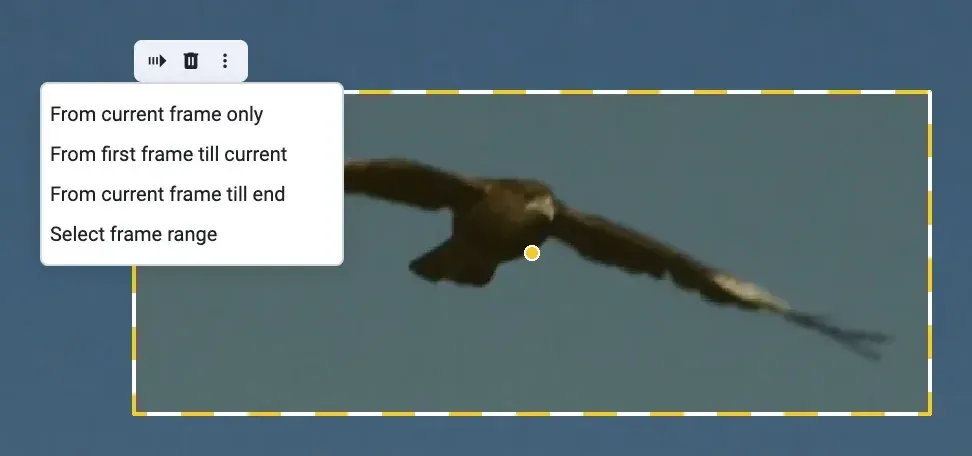 Quick actions panel
White Theme
The update adds a white theme. Switch between it and the original dark mode with the "Theme" button in the top menu.
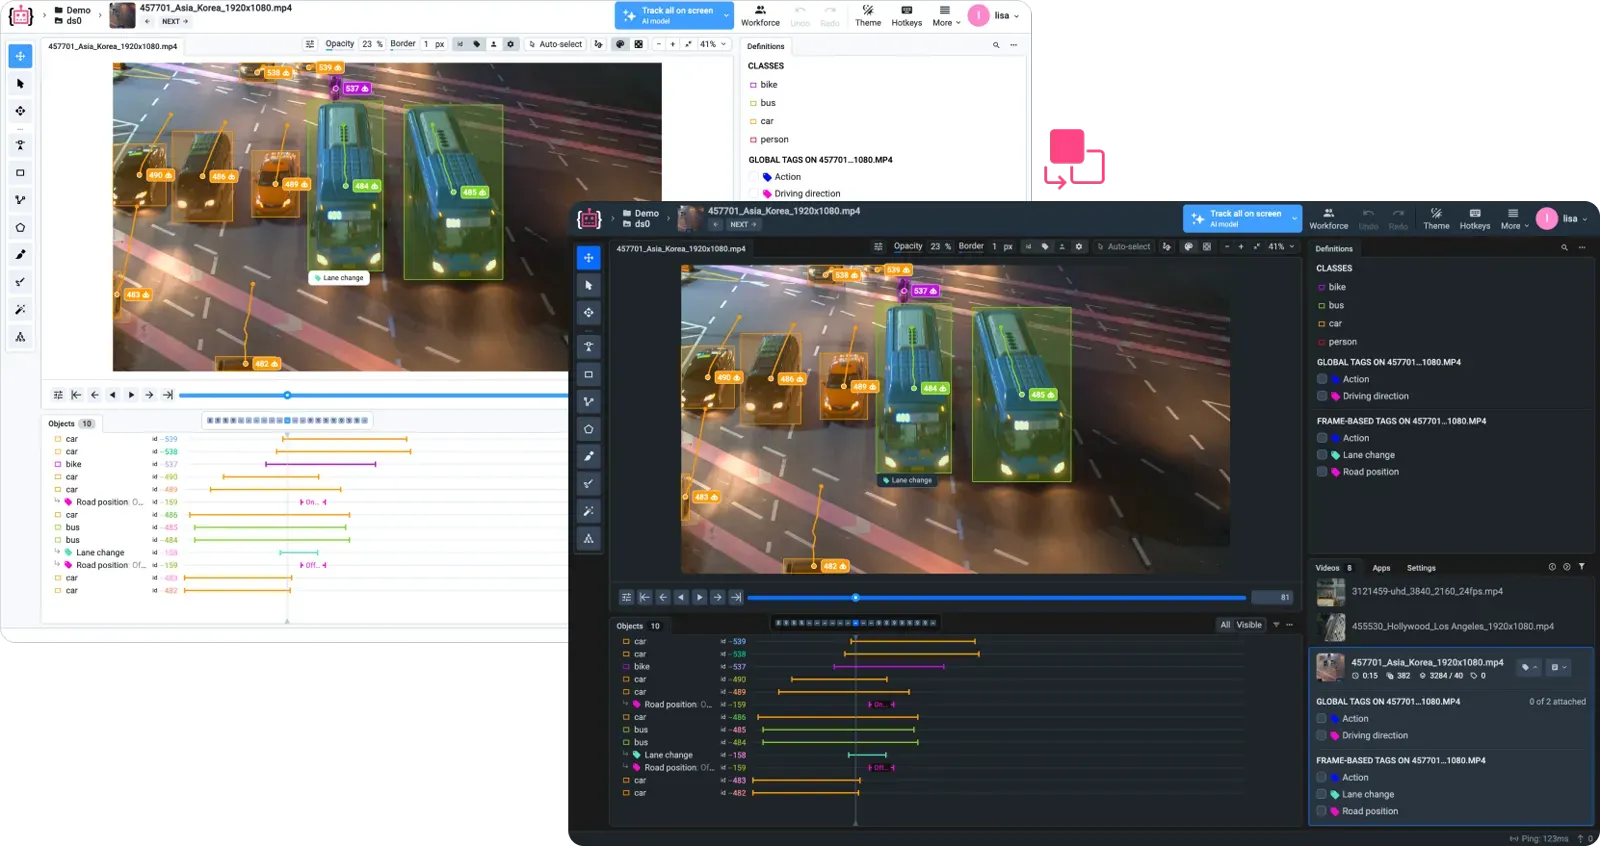 Dark and light themes
Video Annotation 2.0 vs 3.0
| Version 2.0 | Version 3.0 | |
|---|---|---|
| Tracking | Integrated tracking neural networks | Auto Tracking picks the model by geometry and can stop when an object leaves the scene |
| Frame tags | Click "mark frames", select a tag, mark the range on a zoomed timeline | Check the tag box on the current frame, choose where to apply it |
| Timeline | One zoomed timeline, about 50 frames at a time | Objects & Tags panel for the whole video, plus a small floating timeline |
| Review | - | Trajectories view for spotting mixed-up objects |
| Theme | Dark | Dark and white |
Conclusion
Video Annotation Toolbox 3.0 adds auto tracking, simpler tag management, the revamped Definitions panel and a new white theme. Related guides: multi-camera video segments, video with GPS telemetry and audio annotation, which labels time ranges on a waveform and a spectrogram.
You can still switch back to the previous version from the version selection modal.
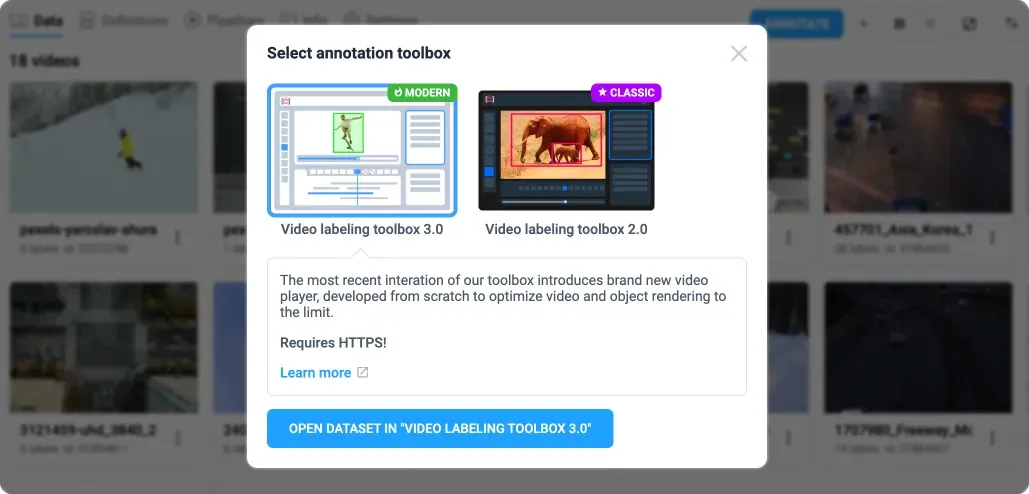 Select new or previous versions
How to Try It?
Video Annotation 3.0 is available on our free community server, complete with pre-deployed AI Auto Tracking!
Want to test your own AI models or have questions? Reach out to us for a demo call!
Frequently asked questions
What is new in Supervisely Video Annotation 3.0?
Version 3.0 adds AI Auto Tracking, a new Definitions Panel for video, simpler frame-based tagging, an Objects & Tags panel that shows all objects and tags on one timeline, Trajectories, a floating Quick Actions panel and a white theme.
How does Auto Tracking choose a model?
Auto Tracking runs on top of tracking apps from the Supervisely Ecosystem, such as MixFormer, and picks the right model for the geometry you label, whether it is a bounding box, a skeleton or a mask. It can also detect when an object leaves the scene and stop tracking it.
Does Auto Tracking support interpolation?
Yes. Interpolation is still supported and remains useful in many scenarios where a simpler method is enough.
How do I tag a range of frames in Video Annotation 3.0?
Check the box for a tag on the current frame and choose where to apply it. By default the tag runs from the current frame to the end of the video. Uncheck the box at the frame where the tag should stop and clear it from that point forward.
What are Trajectories in video labeling?
Trajectories visualize how an object moves from frame to frame, which is most useful with static cameras. If a labeler or a model confuses objects, the trajectory visibly jumps between them, so the mistake is easy to spot.
Can I go back to the previous version of the video toolbox?
Yes. You can switch back to the previous version at any time from the version selection modal.
Where can I try Video Annotation 3.0?
It is available on the free Supervisely community server with pre-deployed AI Auto Tracking. To test your own AI models, contact the team for a demo call.